Introduction to DIY Painted Flower Pots
Everyone loves a splash of color in their living space, and what better way to bring that vibrancy in than with DIY painted flower pots? Painting your own flower pots is not only an enjoyable and creative hobby but it also adds a personalized touch to your decor. Whether they hold lush green plants on a sunny windowsill or bright flowers on a patio, painted flower pots are the perfect DIY project to refresh your home’s look.
With a few supplies and some simple steps, you can transform plain pots into eye-catching pieces. It doesn’t matter if you’re a seasoned crafter or a beginner, this guide will help you through the process of painting flower pots from start to finish. We’ll cover all the essentials, from selecting the right supplies and preparing your pots for painting, to the actual painting process and the final touches that will make your pots stand out.
Not only is this project affordable, but it’s also a great way to upcycle pots you already have or to customize inexpensive ones to fit your style. And the best part? You can adapt these techniques to paint pots for both indoor and outdoor use, ensuring durability and longevity. So, let’s get started on this artistic journey and add some color to your life with DIY painted flower pots.
Necessary Supplies for Painting Flower Pots
To start your DIY painted flower pots, gathering the right supplies is crucial. Here’s what you’ll need:
- Cleaners or degreasers: Use to clean pots and remove any residues. Krud Kutter or TSP are good options.
- Sandpaper: Helps to create a smooth painting surface.
- Primer: Choose a reliable brand, like Kilz, to help paint adhere and last.
- Paints: Acrylic craft paints or specific outdoor paints for durability.
- Sealer: A clear acrylic sealer to protect your finished work.
- Brushes or sponges: To apply primer, paint, and sealer.
- Drop cloths or newspapers: To keep your workspace clean.
- Painters tape or stencils (optional): For patterns and neat lines.
Remember, the type of paint and sealer may vary depending on whether your flower pots will be indoors or outdoors. It’s best to use outdoor-specific products for pots exposed to the elements to ensure they withstand the weather.
Prepping Your Flower Pots for Painting
Before dipping your brush into paint, it’s vital to properly prepare your flower pots. Good preparation ensures that your painting project succeeds and lasts. Follow these essential steps to prep your pots:
Step 1: Cleaning and Drying the Pots
Start by cleaning your pots thoroughly. Use a cleaner or degreaser to remove dirt, oils and dust. Ensure the pots dry completely before moving on to the next step.
Step 2: Priming the Surface
Priming is key for paint adhesion. Apply a coat of primer such as Kilz to cover the pot’s surface. Allow it to dry fully before painting.
Step 3: Sanding the Pots (Optional)
If your pot’s surface is too smooth, gentle sanding helps. Use fine-grit sandpaper to roughen the surface lightly. Wipe away any dust before painting.
Step 4: Applying Painter’s Tape or Stencils (Optional)
For patterns or clean lines, use painter’s tape or stencils. Place them on the pot before you begin painting.
With your flower pots primed and prepped, you’re ready to move on to the fun part — painting! By following these prep steps, you’re ensuring that your diy painted flower pots will be a vibrant part of your decor for a long time.
Step-by-Step Painting Instructions
Step 1: Cleaning and Drying the Pots
First, clean the pots with a degreaser like Krud Kutter or TSP. Remove any grime or dust. Then, let the pots dry fully before doing anything else.
Step 2: Priming the Surface
Use a primer like Kilz to help the paint stick better. Spray or brush the primer on evenly. Wait until the primer dries completely before painting.
Step 3: Applying Paint
Choose your favorite color of acrylic craft paint. Apply the paint with a brush or sponge. For an even coat, add one or two layers of paint. Make sure each layer dries before adding another.
Step 4: Sealing the Painted Flower Pot
Protect your painted pot with a clear acrylic sealer. This step makes the paint last longer. Spray or brush it on and let it dry fully. Now your pot is ready to use!
Tips for Painting Indoor Flower Pots
Painting flower pots for indoor display affords you some flexibility not available with outdoor pots. Here are tips to ensure your indoor pots look great and complement your interior decor.
Choose the Right Paint
Opt for acrylic craft paints, available in various colors. Consider the room’s color scheme when selecting paint for your pots.
Consider Plant Compatibility
Decide what plant will occupy the pot. Remember, some plants need more moisture; choose a paint that withstands humid conditions.
Think About Pot Placement
Will the pot be in direct sunlight? If yes, use a UV-resistant sealer to prevent fading.
Decoration Techniques
Feel free to experiment with stencils, sponges, or painters tape for unique designs. Indoor pots can handle decorative touches that might not withstand outdoor elements.
Finishing with a Sealer
Even indoors, a clear acrylic sealer helps protect the paint. Ensure the sealer is non-toxic if housing edible plants.
By following these tips, your DIY painted flower pots will brighten any room and bring a personal touch to your space.
Guidelines for Outdoor Flower Pot Painting
Painting outdoor pots needs special care to stand up to the weather. Follow these tips to make sure your flower pots last outside.
Choose Weather-Resistant Paints
Go for paints made for outdoor use. They resist sun, rain, and temperature changes.
Use a Sturdy Sealer
An outdoor sealer protects paint from water and UV damage. Apply it after painting.
Prepare Pots Properly
Clean pots well and prime them before painting. This helps the paint stick and last.
Pick the Right Primer
Use a primer made for outdoor surfaces. It gives a better base for the outdoor paint.
Consider the Climate
If it freezes where you live, avoid clay pots. They can crack. Try plastic or composite pots instead.
By using the right materials and preparation, your diy painted flower pots will stay vibrant in any outdoor setting. Happy painting!
Painting Techniques for Concrete Flower Pots
When it comes to painting concrete flower pots, a good technique is crucial. Concrete’s porous nature requires specific steps to ensure a lasting finish. Here’s a simple guide to paint concrete pots effectively.
Start with the Right Primer
Select a primer designed for concrete to improve paint adhesion. It also helps to seal the pores and provide a uniform base.
Cleaning is Essential
Use a degreaser to clean the pot thoroughly. Any dirt or grime can prevent the primer and paint from sticking well.
Apply Primer Evenly
After cleaning, apply a coat of concrete primer evenly. Wait for it to dry completely before moving to the next step.
Smooth Out Textures
If the primer leaves a texture you don’t like, sand it lightly. Wipe away dust before you start painting.
Choose Paint Wisely
Select a paint suited for concrete surfaces. It should withstand the elements if the pot will be outside.
Go for Multiple Thin Coats
Instead of one thick coat, apply several thin layers of paint. Let each layer dry before adding the next.
Seal the Deal
Finish with a concrete-appropriate sealer. This protects your paint job from water, sunlight, and temperature changes.
Let it Dry Fully
Patience is key. Allow the sealer to dry completely before using the pot.
Follow these techniques, and you’ll have a beautifully painted concrete flower pot that stands the test of time.
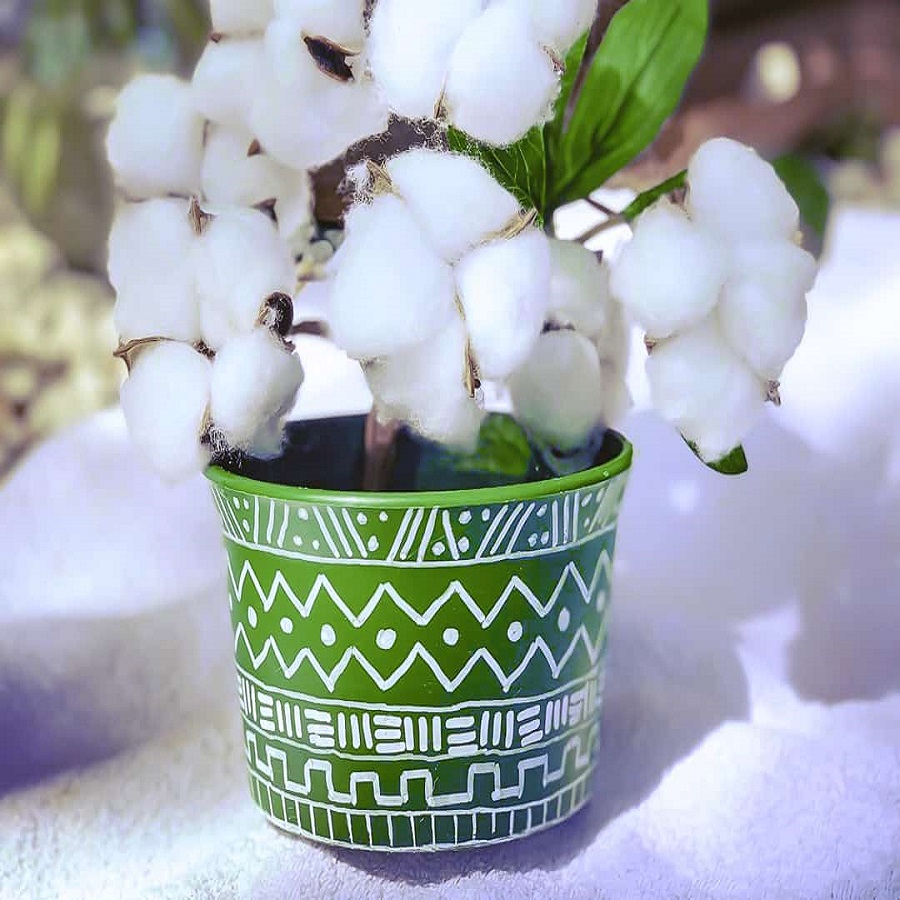
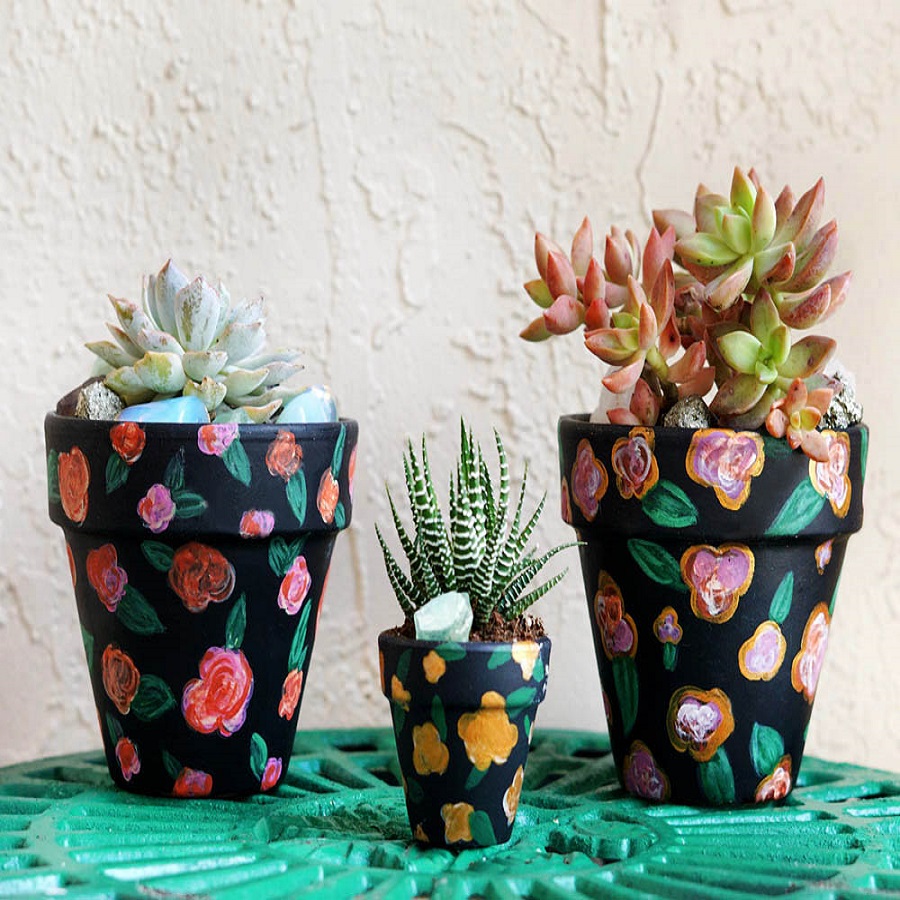
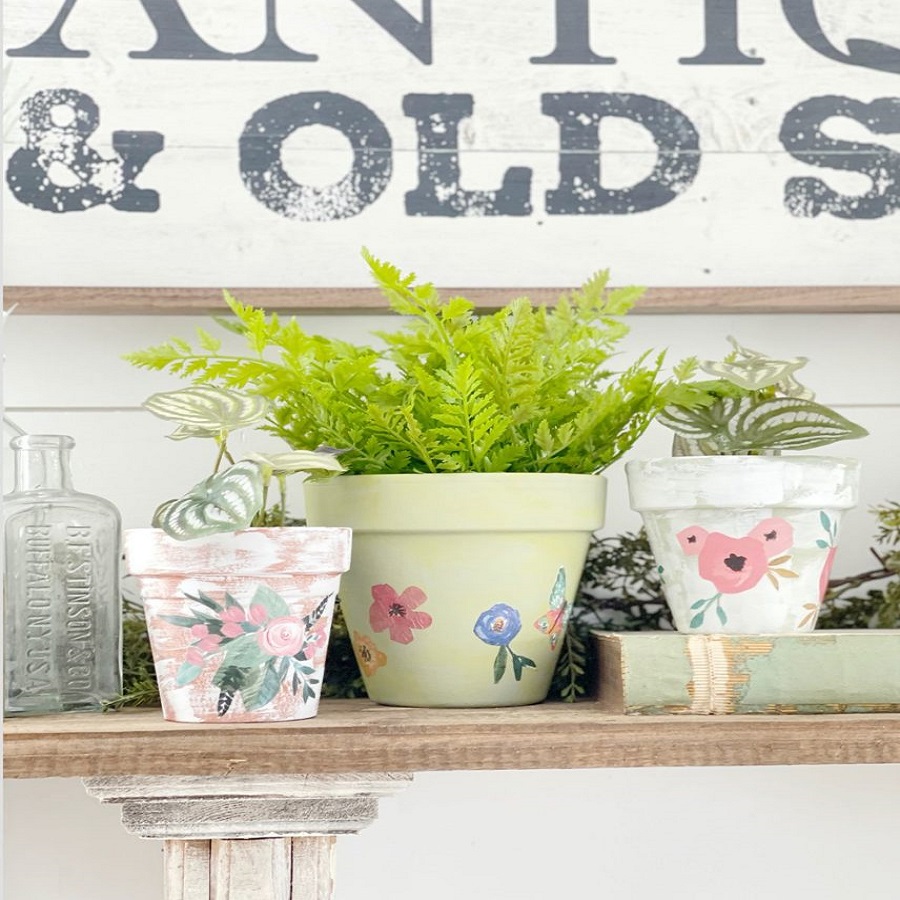
Creative Ideas for Painting Clay/Terracotta Pots
Clay or terracotta pots offer a rustic charm that can be enhanced with a little creativity. Here are some imaginative ways to paint your clay or terracotta pots that will give them a fresh, unique look:
- Ombre Effect: Blend two or more colors to create a gradient look. Start with a darker shade at the bottom and gradually merge into lighter tones as you move up the pot.
- Stencil Designs: Use stencils to add patterns like leaves, flowers, or geometric shapes onto your pots. Secure the stencil onto the pot and apply paint with a sponge for crisp lines.
- Stripes and Bands: Create horizontal or vertical stripes using painter’s tape to keep lines straight and even. Alternate between wide and narrow bands for an eye-catching design.
- Dots and Dashes: For a playful touch, adorn your pots with polka dots, stars, or dashes. Use the end of a paintbrush or a stencil brush to make perfectly round dots.
- Textured Look: Mix sand or baking soda into your paint for a textured finish. This technique works especially well if you’re going for a faux stone look.
- Personalized Pots: Paint names, initials, or favorite quotes on your pots for a personalized touch. This idea is great for gifts or to mark different herbs in your garden.
- Nature-Inspired: Mimic the look of natural elements like marble, wood, or leaves. Use a feather or combing tool to create marbled or wood grain effects.
- Seasonal Themes: Decorate your pots according to seasons or holidays. Think pumpkins for fall, pastels for spring, or snowflakes for winter.
Be sure to seal your creations with a clear sealer to protect them, especially if they will be used outdoors. Make sure the sealer is suitable for clay/terracotta pots, as it needs to be breathable to allow for moisture escape. Remember to let your imagination lead the way and have fun with your diy painted flower pots project!
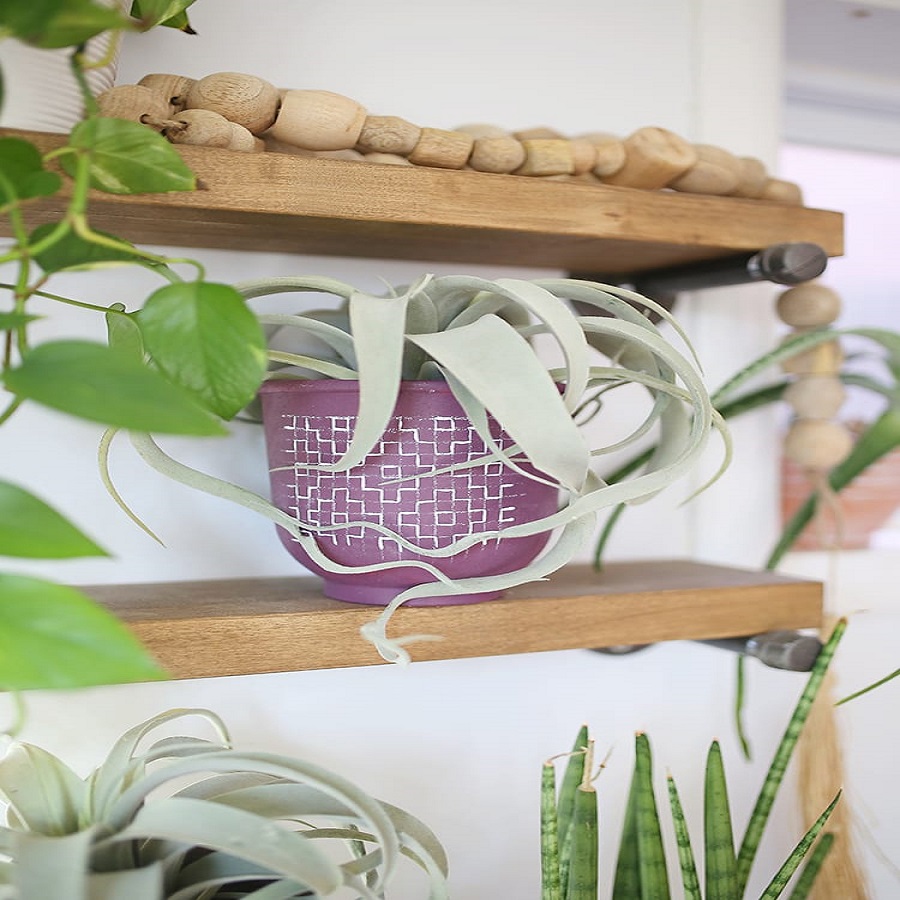
Final Touches and Displaying Your Painted Flower Pots
After the hard work of painting, adding the final touches to your flower pots is rewarding. These steps ensure your diy painted flower pots truly pop in your space.
Add Protective Coatings
Even if you’ve sealed the paint, consider a final coat for extra protection. It helps against scratches and chips.
Cure the Paint
Allow your pots to fully cure. This means letting the paint and sealer set for a few days. Your patience ensures a durable finish.
Choose the Perfect Spot
Find spots in your home that will highlight your pots’ colors and designs. Place them where they receive the right amount of light and visibility.
Arrange Your Plants
Select plants that complement the pot size and color. Ensure they suit your pot’s location, whether it’s sunny or shaded.
Be Mindful of Watering
When watering plants, be careful not to spill on the outside. It could harm the painted finish over time.
Refresh Seasonally
Change plants or move pots around to refresh your decor with seasons. It keeps your space lively and interesting.
Showcase Creatively
Group pots together for impact or use a single pot as a focal point. Your creativity in displaying can add charm to any room.
By handling the final steps with care, your diy painted flower pots will enhance your decor beautifully. Enjoy the fresh look they bring to your home!