Essential Materials and Tools for Concrete Flower Pots
Before you dive into crafting your concrete flower pots, gathering the right materials and tools is crucial. Here, we explore the essentials you’ll need to begin this exciting DIY project.
Tools Needed
- Mixing container: Choose a large bucket or tub to mix your concrete.
- Shovel or hoe: These are useful for mixing your concrete mixture thoroughly.
- Mold: Any shape or size that suits your design, from buckets to custom molds.
- Measuring tools: Measuring cups or scales are needed to measure ingredients correctly.
- Safety gear: Always wear gloves, goggles, and a mask while working with concrete.
Materials Required
- Concrete mix: You can buy ready-mix concrete or create your mix.
- Water: Necessary to mix with your concrete.
- Reinforcement materials: Options include wire mesh or fiberglass to enhance durability.
- Release agent: Oil or a commercial release agent to help remove the pot from the mold.
Ensure you have all these materials and tools set before starting your project to make the process smoother and more effective.

Designing Your Flower Pot
Designing your flower pot is a step where creativity comes into play. It’s your chance to craft something that reflects your personal style and complements your living space. Here are some important considerations to ensure that your design is both beautiful and functional:
Choose the Right Size
Consider the size of the plant that your pot will house. A small pot is perfect for succulents, while larger plants might need more space to grow.
Think About Shape
Do you want a classic round pot, or perhaps something more modern like a square or geometric shape? The shape can determine the pot’s placement and how it interacts with its surroundings.
Plan for Drainage
Proper drainage is critical. Make sure to design your pot with holes at the bottom to prevent water from pooling.
Durability Matters
Think about the thickness of the pot’s walls. Thicker walls offer more durability but require more concrete and longer curing times.
Visual Texture or Patterns
Consider adding textures or patterns to your pot. Use items like leaves or etching tools to create unique designs in the wet concrete.
Color:
While the natural grey of concrete has an understated elegance, you can also mix in pigments to achieve different colors.
Bear these design elements in mind, and don’t be afraid to sketch various versions before selecting your final design. Using sketches, you can visualize your flower pot and make any changes before you start with the concrete mix. The design phase is essential in learning how to make concrete flower pots as it sets the groundwork for the rest of your project.

Preparing the Concrete Mix
Now that you have your design planned out, it’s time to prepare the concrete mix. This stage is critical for determining the strength and finish of your flower pots. Follow these simple steps to create a solid foundation for your creation:
Measure Your Materials
For consistency, always measure your concrete mixture components. Use your measuring tools to portion the concrete mix to water ratio.
Mix Your Concrete
In your mixing container, combine the concrete mix with water. Use a shovel or hoe to mix until you reach a uniform consistency. The mixture should be thick, not runny.
Add Color (Optional)
If you wish to color your flower pots, now is the time. Add pigment to the mixture and stir well to ensure the color spreads evenly.
Include Reinforcement Materials
Add reinforcement materials like wire mesh or fiberglass to your mix. This will help prevent cracks and enhance the pot’s durability.
Make sure to mix thoroughly after each addition, and don’t rush the process. The quality of your flower pots depends on a well-prepared concrete mix. And remember, while working with concrete, wear your safety gear to keep yourself protected.
Molding Your Concrete Pot
Molding is when your design comes to life. Follow these steps to mold your concrete flower pot effectively:
Choosing Your Mold
Decide on a mold that fits your design. You can use old containers or make custom molds. Ensure it’s the right size for your plant.
Applying the Release Agent
Coat the inside of your mold with a release agent. This ensures your pot comes out easily after curing.
Pouring the Concrete
Carefully pour your prepared concrete mix into the mold. Tap the sides to remove air bubbles. These can weaken your pot.
Adding Finishing Touches to the Mold
While the concrete is wet, add textures or embed decorative items. Work quickly but gently to not disturb the concrete.
Setting the Drainage Holes
To allow water to escape, insert small tubes or sticks where you want drainage holes. Make sure they stay in place as the concrete sets.
After the concrete is in the mold, let it sit undisturbed. The concrete needs time to set properly before removal. Be patient during this phase as rushing can cause cracks or imperfections. In the next section, we’ll discuss how to safely demold and cure your flower pot for use.

Demolding and Curing Your Creation
Once you’ve given your concrete flower pot ample time to set in the mold, it’s crucial to move to the next big moment: demolding and curing. This process ensures your creation is sturdy, durable, and ready for display. Proper demolding and curing are vital to end up with a refined product that you can be proud of. Follow these steps to complete this essential part of the project successfully:
Carefully Demold Your Pot
After the concrete has set—usually 24 to 48 hours for initial curing—it’s time to gently remove the pot from the mold. Turn the mold upside down and lightly tap the sides and base to loosen the pot. If you’ve used a good release agent, it should come out smoothly. Be gentle to prevent any cracks or damages.
Begin the Curing Process
Curing concrete is vital for its strength and longevity. Once demolded, place your pot in a spot where it won’t be disturbed. The ideal curing time can range from a few days to a week depending on the size and thickness of your pot. Keep the concrete moist during this period to prevent cracks; you can cover it with a damp cloth or periodically mist it with water.
Test for Dryness
Check your pot’s dryness by touching it. If it feels damp, give it more time to cure. The concrete should be completely dry and hard to the touch before you move to the last steps of your project.
Final Curing
Even when the pot feels dry, a final curing phase is recommended. For optimal strength, let it cure for at least another week. During this time, you may place it in direct sunlight for a few hours each day to fully harden.
By following these steps, you ensure that your handmade concrete flower pots are well-crafted and ready for use. In our next section, we’ll discuss adding finishing touches to enhance the aesthetics and longevity of your concrete containers.
Finishing Touches for Aesthetics and Longevity
Adding finishing touches to your concrete flower pots can boost both their beauty and durability. Here are some effective techniques to enhance your project:
Sealing Your Pot
Apply a concrete sealer to protect your pot from water damage and stains. This step is crucial, especially for outdoor pots. It also makes the surface easier to clean.
Painting Your Pot
If you want color, paint your pot after it has fully cured. Use paints designed for concrete. They help maintain the pot’s look despite weather conditions.
Adding Decorative Elements
Attach tiles, stones, or even mosaics to your pot. These elements can create a unique design. Ensure they are securely attached and use waterproof adhesive.
Surface Finishing
Sanding the surface can remove any rough spots. This makes the pot smoother and safer to handle.
By applying these finishing touches, your concrete flower pots will not only look better but last longer.
Creative Ideas and Inspirations for Concrete Flower Pots
Now that you’ve mastered the basics of how to make concrete flower pots, let’s ignite your creativity with some inspiring ideas. These suggestions can help personalize and enhance your pots.
Use Different Molds for Unique Shapes
Don’t limit yourself to traditional round pots. Experiment with various molds from your home to create unique shapes. Old cake pans, plastic containers, or even cardboard boxes can work.
Add Colorful Aggregates
Mix in colored stones, glass pieces, or recycled ceramics into your concrete mix for a pop of color and added texture.
Create a Dipped or Ombre Effect
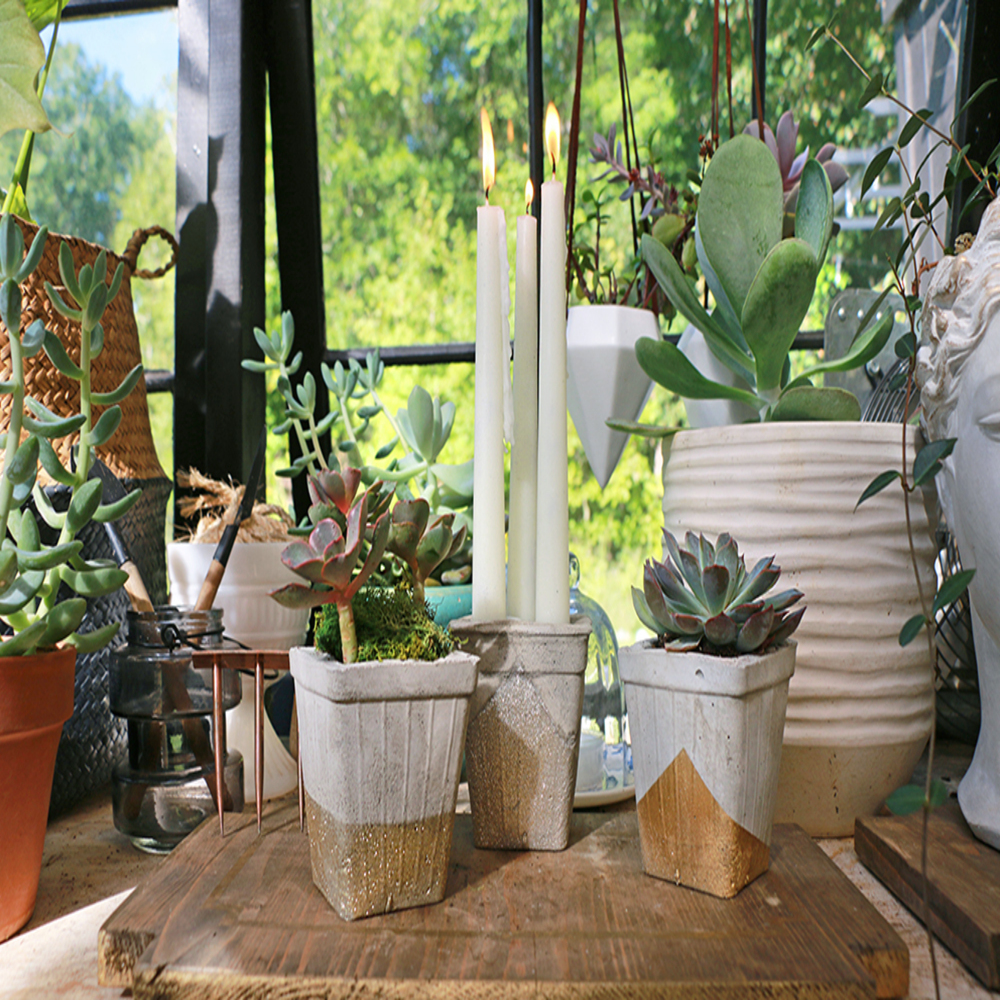
For a modern look, dip the top of a cured pot in paint or use a sponge to create an ombre effect that fades from one color to another.
Press in Patterns with Leaves and Flowers
Before the concrete dries, press in leaves, flowers or even lace to leave a beautiful imprint pattern that adds a touch of nature to your design.
Incorporate Mosaics
After curing, apply a mosaic design using broken tiles or glass to give your pot an artistic flair.
Stencil Designs
Use stencils and concrete paint to create precise patterns or motifs on your pots, which can range from geometric to floral designs.
These creative suggestions can give your concrete flower pots a personal and artistic touch that stands out in any space. Let your imagination run wild and have fun with the design process!
Troubleshooting Common Issues When Making Concrete Pots
While crafting concrete flower pots is an enjoyable project, you might face some hiccups along the way. Identifying common problems and knowing how to fix them is key to creating the perfect concrete pot. Here, we discuss how to troubleshoot typical issues that can arise during the making of concrete flower pots.
Cracks in the Pot
Cracks can occur if the concrete mix is too dry or cures too quickly. To prevent this, ensure your mix has enough water, and keep the pot moist during the curing process. If cracks appear, fill them with fresh concrete mix and allow it to cure again.
Bubbles and Holes on the Surface
Air pockets can form bubbles and holes on your pot’s surface. To reduce this, tap the sides of the mold after pouring the concrete to release trapped air. For a smoother surface, use a finer concrete mix.
Mold Doesn’t Release
A mold that won’t release can ruin your pot’s shape. Apply a generous amount of release agent before pouring the concrete. If it still sticks, gently wiggle the pot or use a rubber mallet to tap the mold.
Uneven Thickness
Uneven walls can make the pot weak. To fix, rotate the mold while pouring concrete or use a tool to spread the mix evenly. After pouring, tap the mold to level out the mixture.
Water Pooling in the Pot
If water pools in your pot, the drainage may be insufficient. Add more or larger drainage holes to the design next time. For a quick fix, drill additional holes after the pot cures.
Color is Off
Mismatched color can happen if the pigment isn’t mixed well. Mix the pigment evenly with the concrete before pouring. If the color is too light, apply a concrete stain or paint after curing.
By knowing how to address these common issues, you’ll be on your way to creating beautiful, durable concrete pots. Keep practicing, and don’t let setbacks curb your creativity. Every attempt teaches you more about how to make concrete flower pots.
