Introduction to Plastic Bottle Flower Pots
In the world of environmental sustainability, upcycling has emerged as a creative and resourceful way to reduce waste while crafting something useful and beautiful. Among the myriad of upcycling projects, creating flower pots from plastic bottles stands out for its simplicity, accessibility, and eco-friendliness. With millions of plastic bottles being discarded daily, transforming them into charming flower pots not only helps mitigate the plastic pollution problem but also offers a delightful gardening project that can be enjoyed by people of all ages. This article delves into the detailed process of crafting plastic bottle DIY flower pots, guiding you through each step to ensure your project is both successful and satisfying.
Selecting the Appropriate Bottles
The foundation of a successful plastic bottle flower pot lies in selecting the right type of plastic bottle. PET (Polyethylene Terephthalate) bottles are the most suitable due to their durability and ease of cutting. These bottles are commonly used for beverages and are readily available in various sizes. When choosing bottles, consider the size and shape that will best suit your gardening needs. Larger bottles, like those used for soda or water, provide ample space for root growth and are ideal for most plants. Ensure the bottles are free from cracks or holes (except for intentional drainage) to maintain their integrity when used as planters. Additionally, avoid using bottles that previously contained harmful chemicals, as residues could adversely affect plant health.
Preparing the Bottles for Crafting
Once you’ve gathered your selection of plastic bottles, the next step is to prepare them for transformation. Start by removing any labels and adhesive residue. This can be done by soaking the bottles in warm, soapy water for a few hours, which helps loosen the labels for easy peeling. Scrub off any remaining glue with a brush or sponge. After cleaning, rinse the bottles thoroughly and allow them to dry completely. This preparation stage is crucial because clean bottles ensure better adhesion if you’re planning to paint or decorate them later. Moreover, ensuring that all residues are removed prevents any potential contamination that could harm your plants.

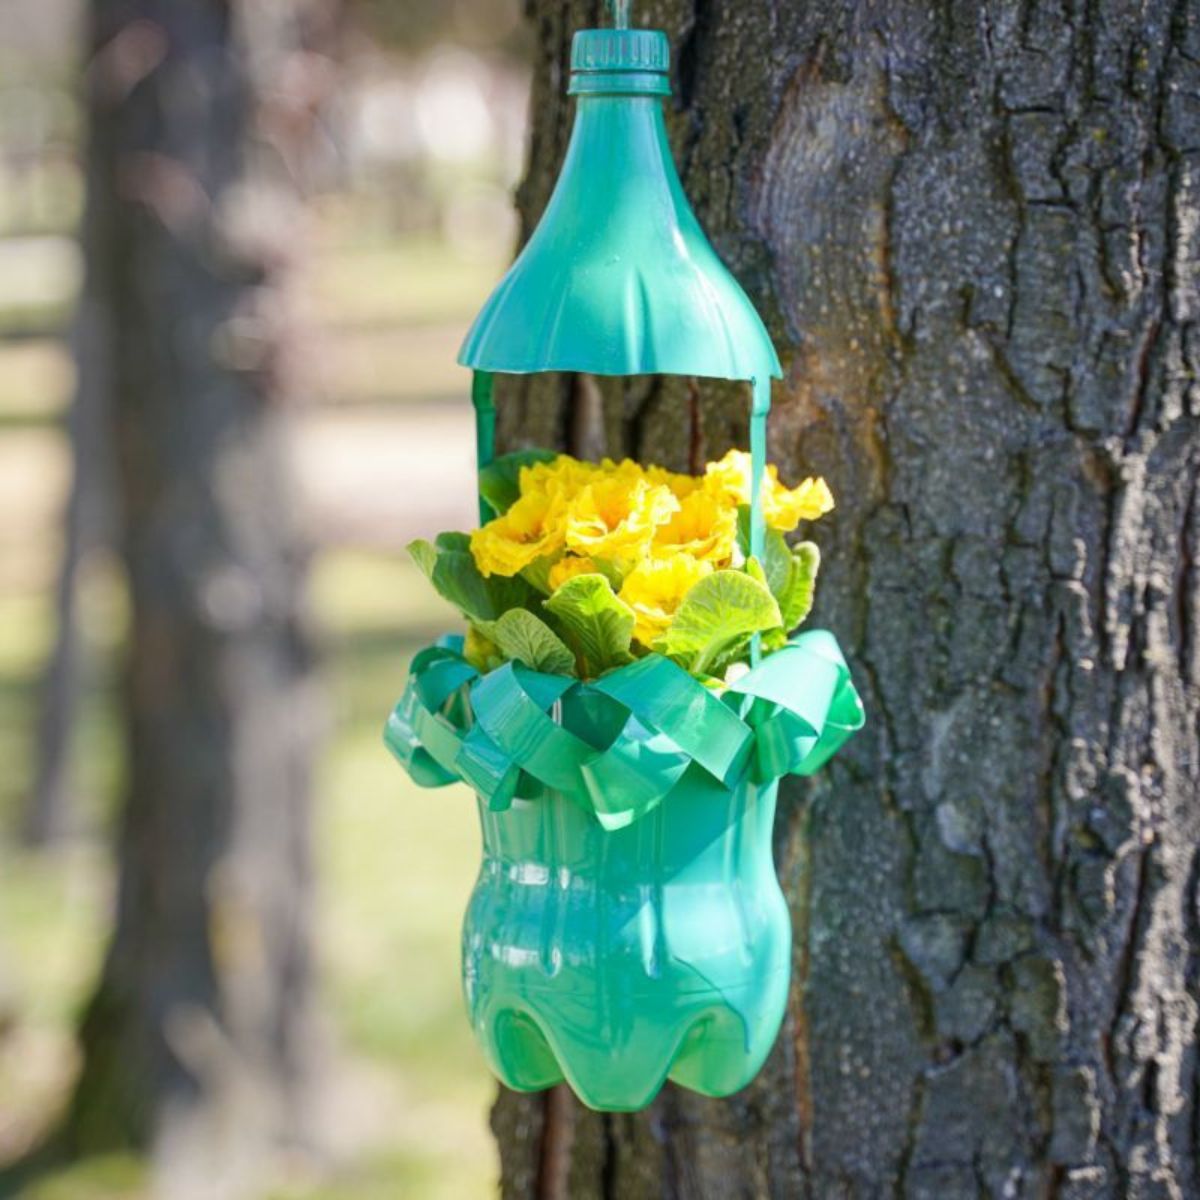
Cutting and Shaping the Bottles
Transforming your plastic bottles into flower pots requires careful cutting and shaping. First, determine the desired height of your flower pots and mark a line around the bottle accordingly. Using a sharp pair of scissors or a craft knife, carefully cut along the marked line. If you’re new to this, it might be helpful to start with a utility knife to make a small incision and then use scissors to complete the cut for a smoother edge. Depending on your design preference, you can create different shapes – some may prefer straight cuts for a classic look, while others might opt for wavy or scalloped edges for a more whimsical appearance. Remember to handle the cutting tools with care to avoid any accidents.
Creating Drainage Holes
Proper drainage is vital for the health of your plants, as it prevents water from accumulating at the bottom of the pot, which can lead to root rot. To create drainage holes, heat a metal skewer or use a small drill to puncture several holes in the bottom of each bottle. Ensure that the holes are evenly spaced to facilitate effective water drainage. The number and size of the holes can vary depending on the size of your bottle and the type of plant you’re planning to grow. For larger bottles, a few extra holes might be necessary. This step ensures that your flower pots function just as well as traditional ones in maintaining the right moisture levels for your plants.
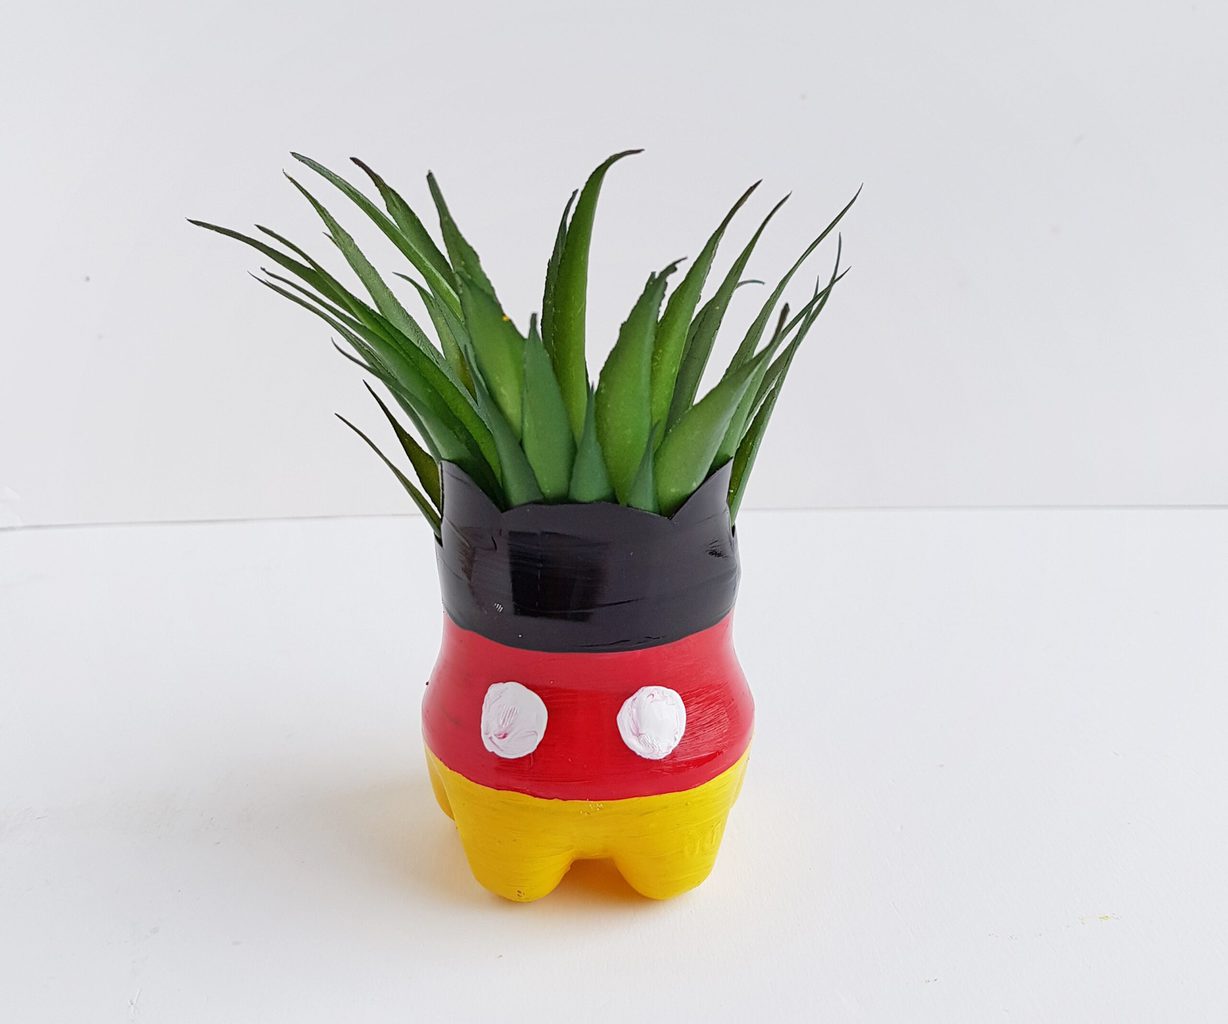
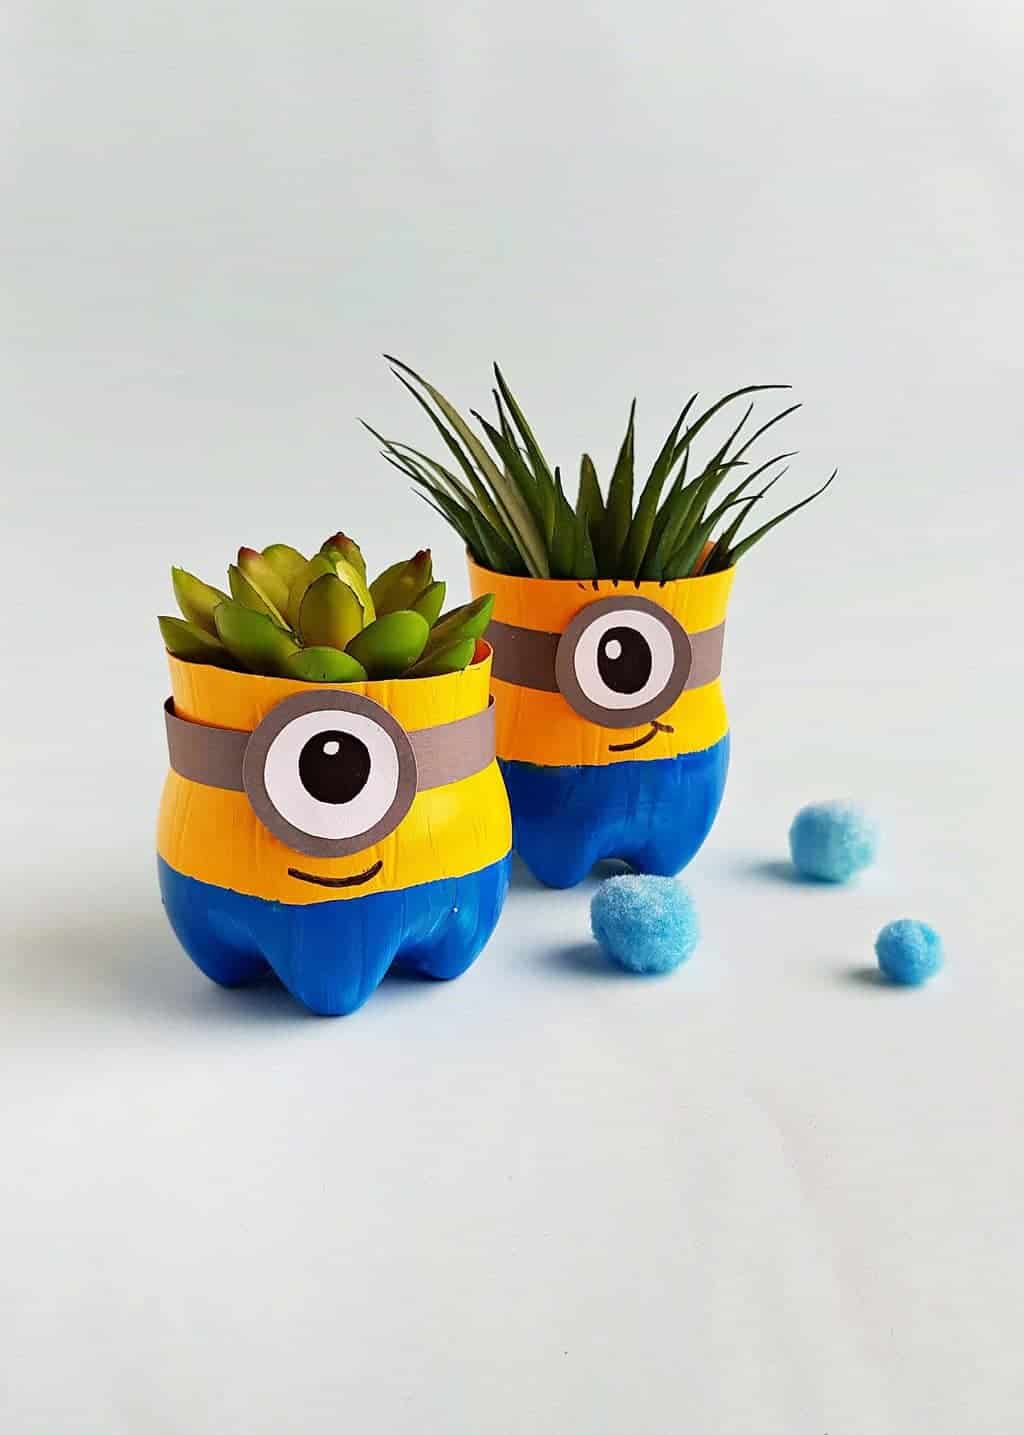
Decorating Your Flower Pots
With the practical aspects completed, it’s time to unleash your creativity and decorate your plastic bottle flower pots. There are countless ways to personalize and beautify your creations. Painting is one of the most popular methods; you can use acrylic paints to apply vibrant colors and patterns. Before painting, lightly sand the surface of the bottle to help the paint adhere better. Alternatively, you can wrap the bottles with decorative materials such as fabric, twine, or ribbon to achieve different textures and styles. Adding embellishments like beads, buttons, or shells can further enhance the aesthetic appeal. The key is to let your imagination guide you, creating unique pieces that reflect your personal style and blend seamlessly with your home or garden decor.
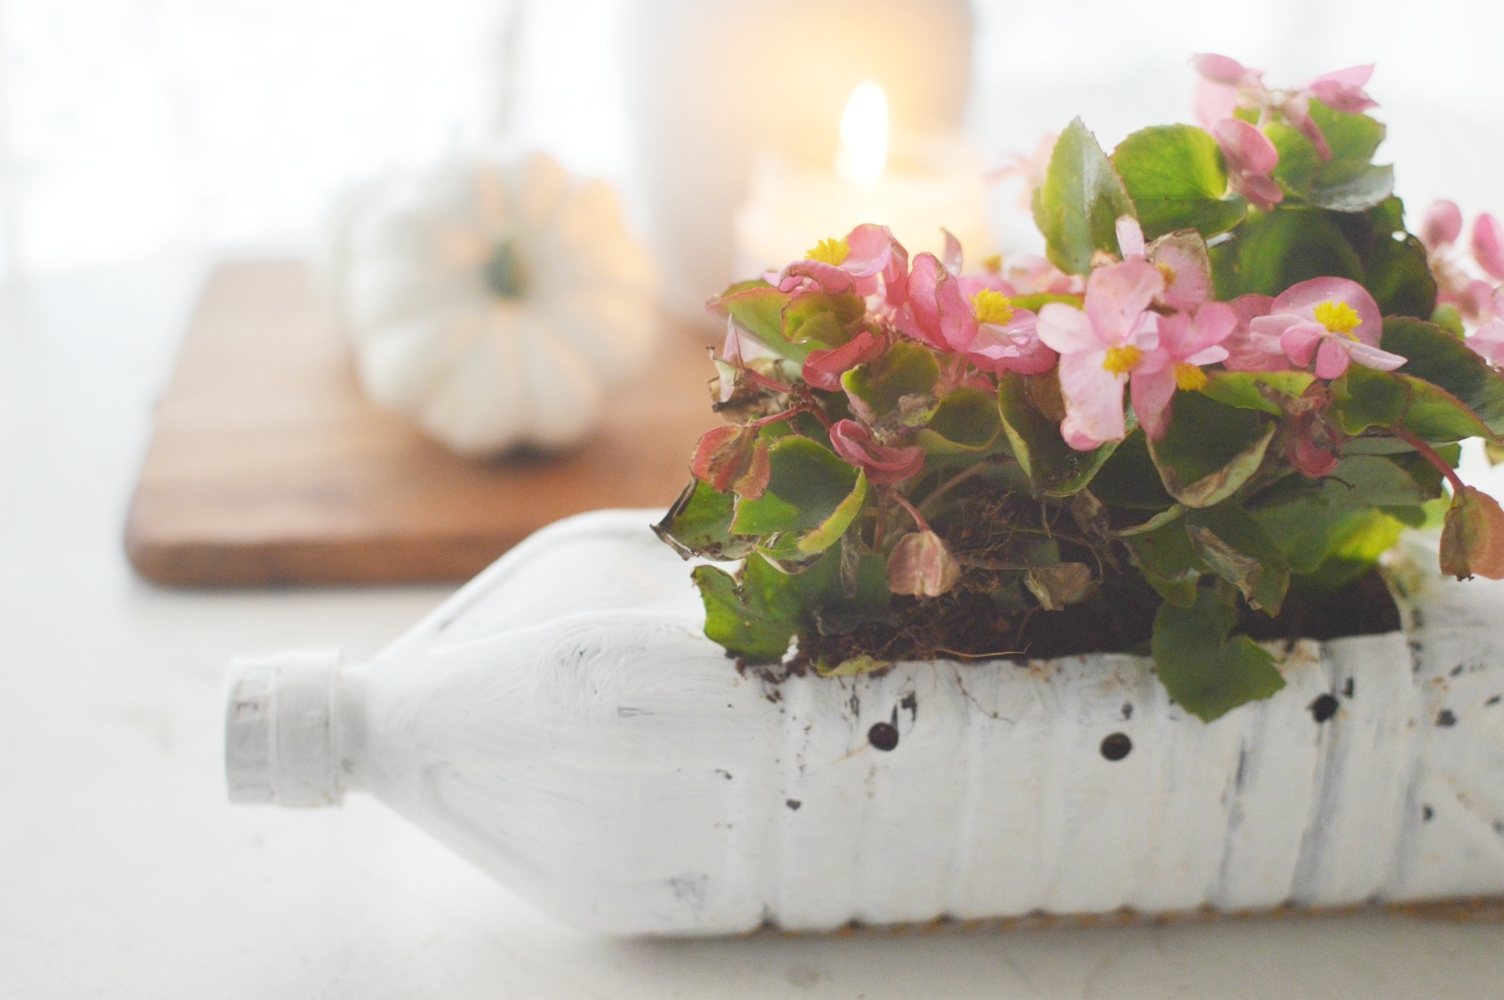
Filling the Pots with Soil
After decorating, it’s time to fill your newly crafted flower pots with soil. Choose a high-quality potting mix that suits the types of plants you intend to grow. Fill the pots about two-thirds full, gently tapping the sides to eliminate air pockets. If your bottle has a narrow neck, consider using a funnel to make the process easier. The soil should be loose and rich in nutrients to support healthy plant growth. Avoid compacting the soil too much, as roots need space to spread and access oxygen. If you’re planting seeds, follow the specific planting depth instructions on the seed packet. For transplanting seedlings, dig a small hole in the soil, place the plant, and cover the roots, pressing the soil gently around the base.
Choosing the Right Plants
Selecting the right plants for your plastic bottle flower pots is crucial for ensuring their growth and health. Consider the size of your pots and the growing conditions they can provide, such as light availability and space constraints. Herbs like basil, parsley, and mint are excellent choices for smaller pots and indoor environments, while succulents and cacti are ideal for those who prefer low-maintenance plants. For outdoor settings, flowering plants like marigolds, petunias, and pansies can add vibrant color to your garden. Ensure that the plants you choose are compatible with the climate and environment where they will be placed. Research the watering, sunlight, and soil requirements of each plant to make informed choices that will thrive in your DIY flower pots.
Transplanting and Plant Care
Once you’ve chosen your plants, the next step is transplanting them into your plastic bottle flower pots. Carefully remove the plants from their nursery pots, being mindful of their delicate root systems. Place each plant into its respective pot, adjusting the soil level as needed to ensure the roots are adequately covered and the plant is stable. Water the plants thoroughly after transplanting to help them settle into their new environment. Ongoing care includes regular watering, but be cautious not to overwater – the drainage holes will help with this. Position your pots in an area that receives the right amount of sunlight for the particular plants you’ve chosen. Regularly check for pests and diseases, and prune your plants as needed to encourage healthy growth and prevent overcrowding.
Maintenance and Long-Term Care
Maintaining your plastic bottle flower pots involves consistent care to ensure the health and vibrancy of your plants. Regularly inspect your pots for signs of wear and tear, such as cracks or weakened areas, and make repairs as needed. Over time, soil nutrients can become depleted, so consider supplementing with organic fertilizers to keep your plants nourished. Rotate the pots occasionally to ensure even sunlight exposure and prevent plants from leaning towards the light. If you notice any pests, address them promptly with eco-friendly pest control methods. Regular pruning and deadheading will help maintain the shape and encourage blooming. With proper care, your DIY flower pots can provide a thriving home for your plants for many seasons.
Environmental Benefits
Crafting flower pots from plastic bottles is more than just a creative endeavor; it contributes significantly to environmental conservation. By repurposing plastic waste, you reduce the amount of litter that ends up in landfills and oceans, where it poses a threat to wildlife and ecosystems. Each plastic bottle you transform into a flower pot is one less bottle polluting our planet. This project also raises awareness about the importance of recycling and inspires others to think creatively about reusing materials. Moreover, engaging in such sustainable practices fosters a sense of responsibility and connection to the environment, encouraging more eco-friendly habits in other areas of life.
Educational and Therapeutic Value
The process of creating plastic bottle flower pots offers educational and therapeutic benefits. For children, it serves as an excellent hands-on learning activity that teaches about recycling, plant biology, and environmental stewardship. They gain practical skills in crafting and gardening, fostering creativity and curiosity. For adults, the project can be a relaxing and rewarding hobby that provides a break from the stresses of daily life. Gardening has been shown to have therapeutic effects, reducing anxiety and improving mental well-being. Working with plants and engaging in creative activities can be a form of mindfulness, helping individuals feel more grounded and connected to nature.
Conclusion
Crafting plastic bottle DIY flower pots is a simple yet impactful way to contribute to environmental sustainability while indulging in a creative and fulfilling project. By following the steps outlined in this article, you can transform discarded plastic bottles into charming and functional planters that brighten up your living space or garden. This practice not only reduces plastic waste but also offers numerous personal benefits, from educational opportunities to mental well-being. As you embark on this upcycling journey, you’ll find satisfaction in knowing that you’re making a positive difference for the planet and enjoying the beauty of plants nurtured in your handmade creations. So, gather those plastic bottles, unleash your creativity, and start crafting your own unique flower pots today!